There are a number of ways you can do this, depending on if you want to spend any money and what plugins you have on your website set up. If you are here for just Contact Form 7 then skip to that part, but we are also going to be covering some other options. Including a User Registration plugin and how to do it using WP Forms.
WordPress contact form that registers users
There are a number of plugins that do this for you, however, they can be quite heavy plugins that slow down your site. But if you want a quick and easy solution, this plugin will do the trick, it’s called “User Registration – Custom Registration Form, Login Form And User Profile For WordPress”, you can find the link here.

This plugin simply allows you to create custom forms for users to input their data. You can create custom user registration forms, but it is fairly limited when using the free version of the plugin. This plugin is also good for creating login pages, as well as account pages and everything else you needs to implement a useable registration system.
The custom form uses a drop and drag function so no code is needed. It also has a built-in email notification system that you can customise when new users sign up. It also allows you to assign the correct user role.
Again this is a good plugin if you want a simple set-up, but it is a fairly heavy plugin and it doesn’t have many customisable options, so if you want less load on your site keep reading for some more options.
WP Forms user registration
This is probably the best solution if you have a bit of a budget for your website. WP Forms allows you to create a completely custom registration form with any number of fields at your disposal. Perfect for creating a more complex system. For example, if you are making a site that allows users to create their own profile, like a food ordering system. You could ask questions like “Are you vegetarian?” or “Can you eat dairy?”, on set up. This can then be stored in their user data. If you are looking to download WP Forms you can view it here.
How to create a custom user registration form using WP Forms
You will need the Pro version of WP Forms in order for this to work.
First, make sure you have WP Forms installed, you can download it here if not. You can also go to the Plugins areas and search for WP Forms.
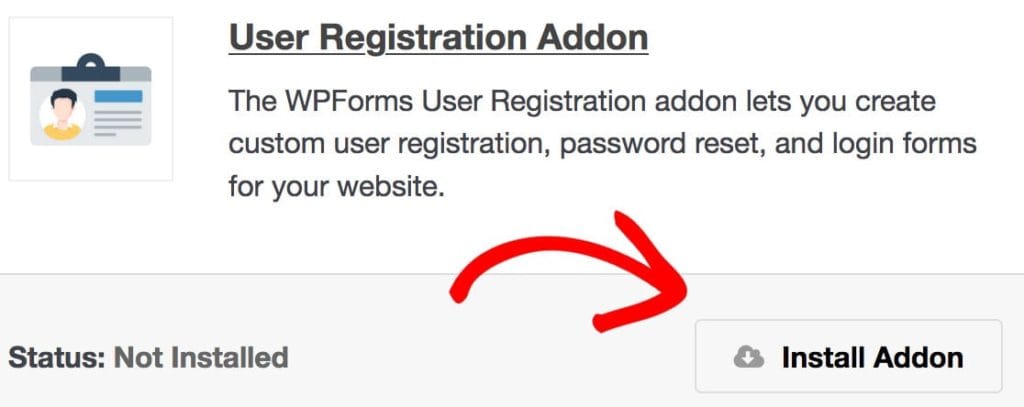
Once you have activated the plugin, go to WP Forms and click on Addons. You will need to download the User Registration Addon. Make sure it says Active.
You can create your form now.
Go to WP Forms again and press Add New, you can either choose a pre-made template or you can create a blank one. In our example, we’ll use a blank one.
Make sure you name your form, then we can start making it, you’ll need the following fields for it to work:
- Name
- Single Line Text (for username input)
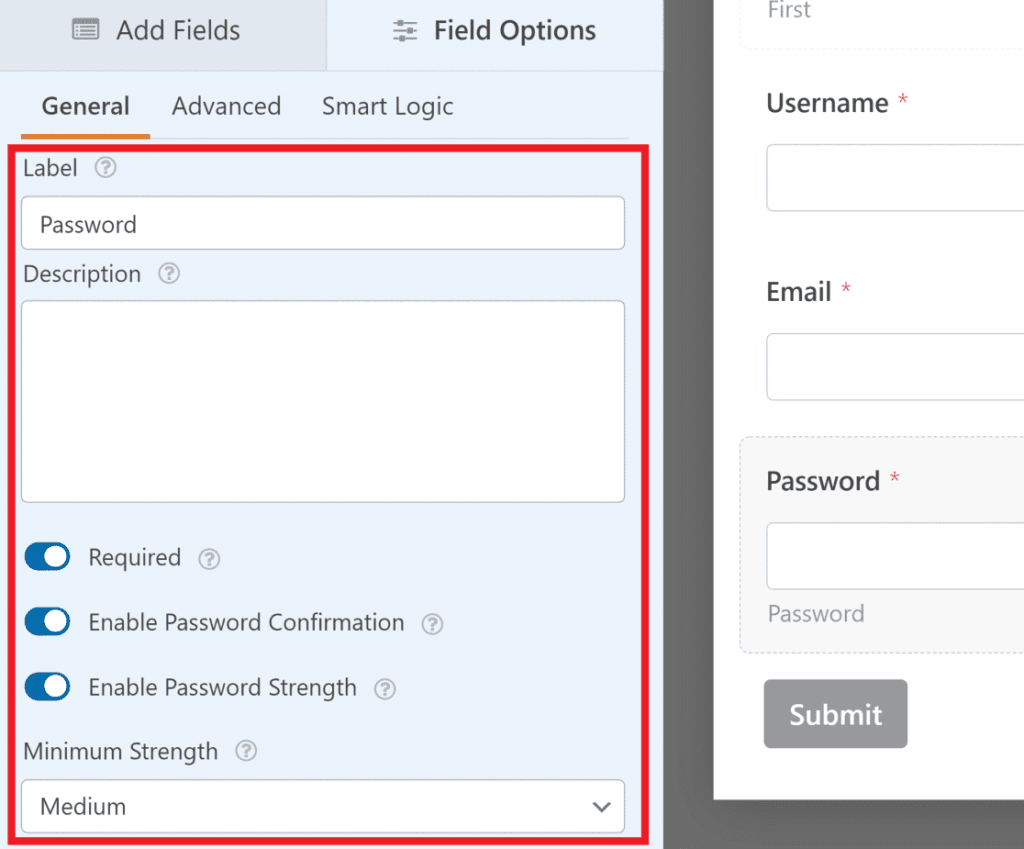
- Password
To create the password and password confirmation field you can go to the field options tab and enable “Required”, “Enable Password Confirmation” and “Enable Password Strength”.
One more important setting, go on Settings and then User Registration, and make sure you “Enable User Registration”. Your form should now be fully functional.
The form fields are all there for you when you set things up so this process is pretty easy.
If you want an extra layer of protection, make sure you set up Google Recaptcha.
How to create a contact form 7 registration form for free
Using Contact Form 7 as your registration form is good if you are already committed to this plugin and you want it completely customisable. You will however need to use one other plugin to make this work.
There are a few ways of doing this but, in my opinion, the best way, it’s using a plugin called Automator. It allows you to set up automations on your website without the need to do any kind of coding, best of all, it’s free! You can download it here.
How to add a password field to contact form 7
Before you start, you’ll need a password field, by default Contact Form 7 does not have a password field. You can create one by simply adding the code to your function.php or on a code snippets plugin.
function cfp($atts, $content = null) {
    extract(shortcode_atts(array( "id" => "", "title" => "", "pwd" => "" ), $atts));

    if(empty($id) || empty($title)) return "";

    $cf7 = do_shortcode('[contact-form-7 404 "Not Found"]');

    $pwd = explode(',', $pwd);
    foreach($pwd as $p) {
        $p = trim($p);

        $cf7 = preg_replace('/<input type="text" name="' . $p . '"/usi', '<input type="password" name="' . $p . '"', $cf7);
    }

    return $cf7;
}
add_shortcode('cfp', 'cfp');
Now you will be able to add the shortcode in your contact form 7 form. Your contact form will password field will look like this:
<p>Your Password<br />
  [text* password] </p>
Now you can continue with your custom registration form.
Here’s how you can create a registration form using Contact Form 7 and Automator.
- Install and activate both the Contact Form 7 and Uncanny Automator plugins on your WordPress site.
- Create a new Contact Form 7 form that includes fields for the information you want to collect from users during registration. For example, you may want to include fields for name, email address, username, and password. Once you have made your form, make sure you save it.
- Once you’ve created the form, go to AutomatorWP and click on Automations. Then press Add New Automations.
- When the popup appears, click Anonymous, then confirm, give it a title and then, under the Triggers section, select Contact Form 7, then press “Guest Submits form”. It will now say “Guest submits any form”, you can click on this and then select what form you want this to apply to. Once you have found it, press save.
- Under the actions heading, make sure you press “New User”, Press the Lines along the right and select how you want to configure how you want the username to be selected. If you want to use a form field from your chosen contact form 7, click on the “Guest submits” section and then click “Form Field Value”. Replace the wording, “FIELD_NAME” with the name of the field in your contact form, for example {1:form_field:your-email}. You need to do this with all of the form fields you want to include in your custom registration form.
- Once you’ve configured the action, make sure you select the options you want to include. Such as the email being sent, if the user already exists etc.
That’s it! You can do a number of other things with this plugin, including sending a custom email when someone registers. Play around with these settings to make sure you get things right. If you want to read more about the Automator plugin then visit their documentation site.
Thanks for reading our post, we put a lot of time and effort into these blog posts to make sure that they are up-to-date and useful for the readers!